Inspections
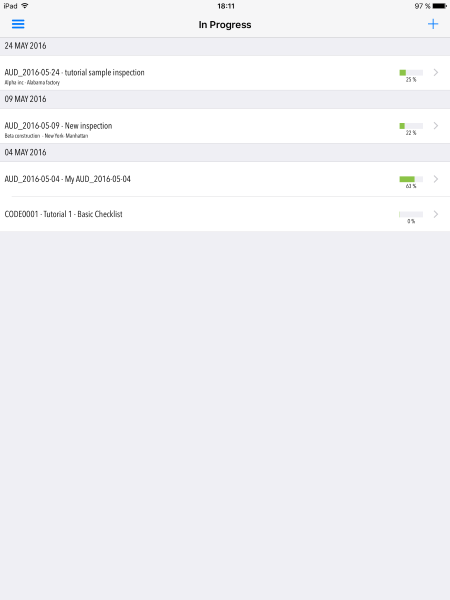
Inspections are classified in three (3) main groups. Each group contains one or more inspection' status
Like a template, an inspection is a 3-tier document. It has a header with main information, several sections and each section contains as many questions as you need. Inspections are created in different ways.
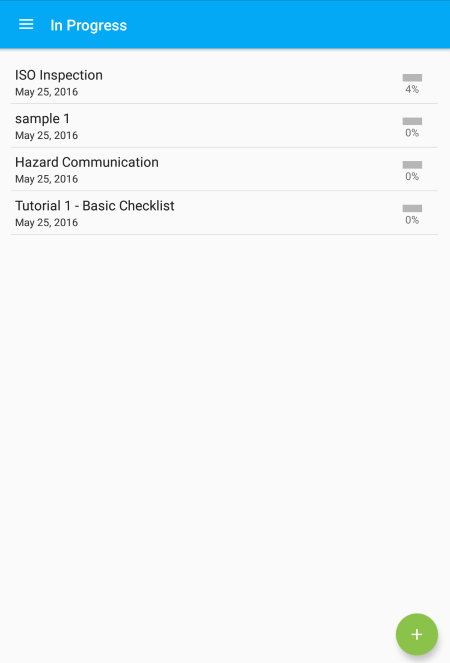
| In Progress | In progress inspections are those inspections you are working on. Their status is "Open" and they keep that status until you perform the lock and close process. |
| Completed | Completed inspections are those in which you run the lock and close process. Their status changes from "Open" to "Closed".
Be aware that closed inspections can be both fully answered and partially answered inspections. Inspections have or have not all the questions answered. Take a look at the general settings and the template settings for details.
|
| All | This group contains all existing inspections in your device. Therefore this group lists not only in progress and completed but also rejected Plinius Users inspections. rejected inspections are those you receive from your Plinius Inspections Account and for whatever resason decide to reject. They will remain in your device until you perform the next sync process. |
| 1 | From scratch. You create a blank inspection. Add up as many sections and questions as you need. |
| 2 | From a template. You select a template from your device's templates and create the inspection. This process copy all the sections and questions from the template in your new inspection. |
| 3 | From sync. Running the sync Plinius Users process. You receive (download) an inspection from Plinius Inspections. That inspection has been created in Plinius Inspections and assigned to you. |
The list shows the current inspections stored in your device. The following table shows the information provided in the list. Tap on any row to select and enter into the details.
| Field | Description |
|---|---|
| Title | The title is composed by the inspection code and name. |
| Subtitle | The subtitle is composed by the company and site names plus the start date Android values. When those values are blank, the subtitle remains blank. For iOS users the date is used to group inspections. |
You can perform several actions within a template. The following table shows the available actions.
| Action | Description |
|---|---|
| Android iOS | Tap to create a new inspection. Located in the lower right side for Android devices and in the upper bar for iOS devices. |
| Android | Swiping right the row to get a PDF report. |
| Android | Swiping right the row to lock the inspection, setting it as completed. |
| Swiping left the row to delete the inspection. |
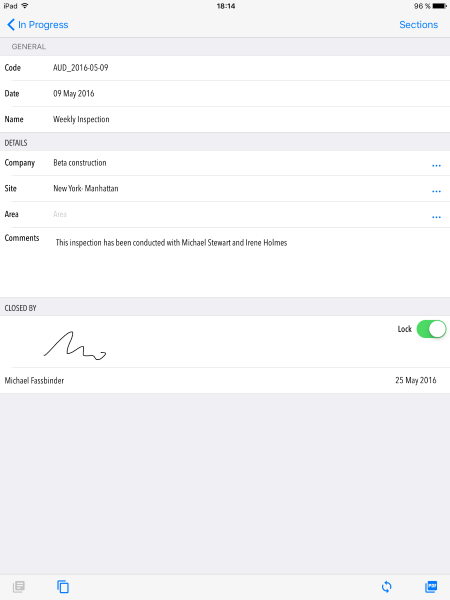
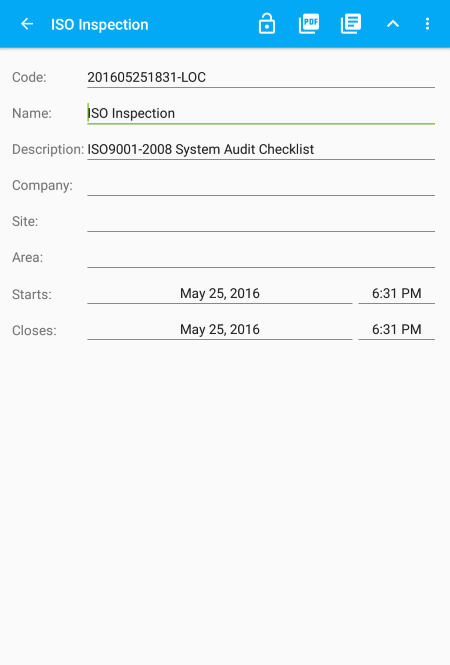
The header shows details about the inspection you selected. The following table shows the available fields. View may differ according to your device. In Android devices this is not shown by default. In that case tap the "Show More" icon for details.
| Field | Description |
|---|---|
| Code | This is the code you assign to the inspections. If no code is given, the system will assign one by default. |
| Name | This is the inspection name. if no name is given, the system will assigm one by default |
| Description | These are de comments or description you write in the inspection. |
| Company | Company or organization the inspection is related to. This field is optional. You can select from the list of available Plinius Users companies using the Android or iOS buttons.
Be aware that Plinius Users according their settings may be constrainted to select from the list Android, see Profile Settings for details, otherwise you can enter any value.
|
| Site | This is the site, facility or premises where you conduct the inspection. This field is optional.
Be aware that Plinius Users according their settings may be constrainted to select from the list Android, see Profile Settings for details, otherwise you can enter any value.
|
| Area | this is the specific area affected by this inspection. This field is optional.
Be aware that Plinius Users according their settings may be constrainted to select from the list Android, see Profile Settings for details, otherwise you can enter any value.
|
| Start | This is the date you started the inspection. |
| Close | This is the date you closed the inspection. |
You can perform several actions within an inspection. The following table shows the available actions.
| Action | Description |
|---|---|
| Android iOS | This button creates a new sections. It appears or is enabled according to the inspection settings. When an inspection comes from a template which does not allow to add sections. Then, this button will be disable or gone. It is located in the lower right side Android or in the upper bar iOS |
| Android | This button locks the inspection. For iOS users the equivalent button is the lock switch. |
| This button generates the pdf report. This button is located in the upper bar for Android and in the lower bar for iOS | |
| This button allows you to apply any of the existing templates to your current inspection. For iOS this button is located in the lower bar.
Be aware that if you started an inspection from a template, you will be allowed to do this when the template allows to add new sections, otherwise you cannot do it.
|
|
| Show More/Less icon Android | This button is located in the navigation bar. Tap to show the available fields. In Android devices the inspection details view shows the inspection name in the navigation bar and the list of sections below. When tapping this button, the details show up to edit. Tap to collapse details and go back to list of sections. |
| iOS | This button runs the synchronization process. For Android users the menu entry is located in the "More" button. |
| iOS | This button save your inspections as a new blank inspection or as a template. For Android users the menu entry is located in the "More" button. |
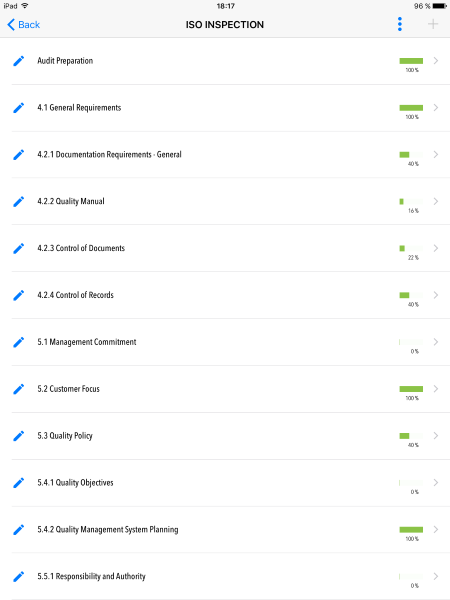
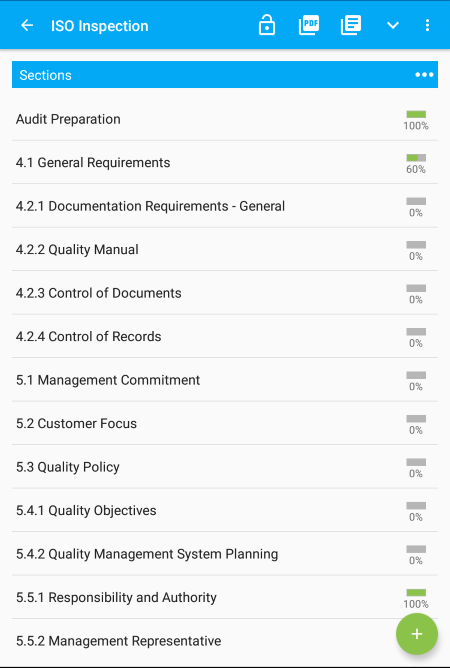
The list shows the different sections in which the inspection is divided. Accessing any section you can setup additional parameters. This list appears within the inspection header Android. Tap any row to enter and then tap the Show More/Less icon on the upper bar for additional details.
| Field | Description |
|---|---|
| Name | the name of the section. |
| Weight | The weight you assigned to this section. This applies when calculating the score. optional By default it is set to one (1) |
| Answer all question before locking | This switch controls the behavior of this section when locking the inspection. Set ON when you want that all questions contained within the section must be answered before performing the  lock inspection action. lock inspection action. |
| Lock the Questions | This switch controls the behavior of this section in both editing and creating. When ON you can add additional questions. |
Troubleshooting: Save or Add buttons are disabled and it comes from a template. Check out the template details for the "Lock The Sections" value.
You can perform several actions within a section. The following table shows the available actions.
| Action | Description |
|---|---|
| Android iOS | Tap to create a new section. Located in the lower right side for Android devices and in the upper bar for iOS devices. |
| Swipe left the row, the button shows up, then tap to delete. | |
| iOS | Tap this button to edit the section. |
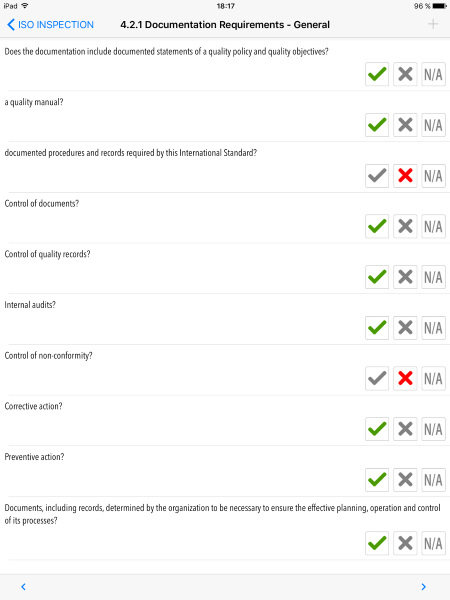
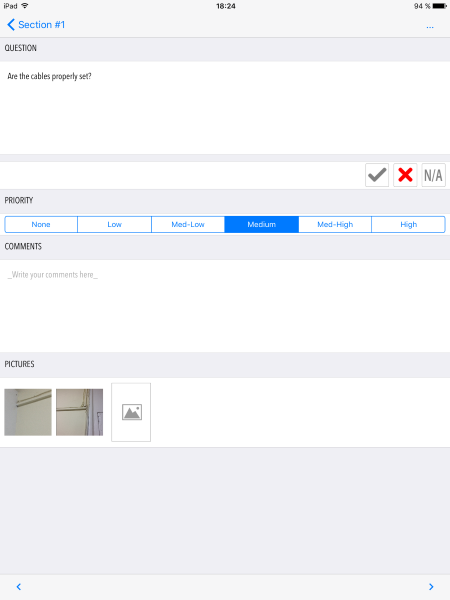
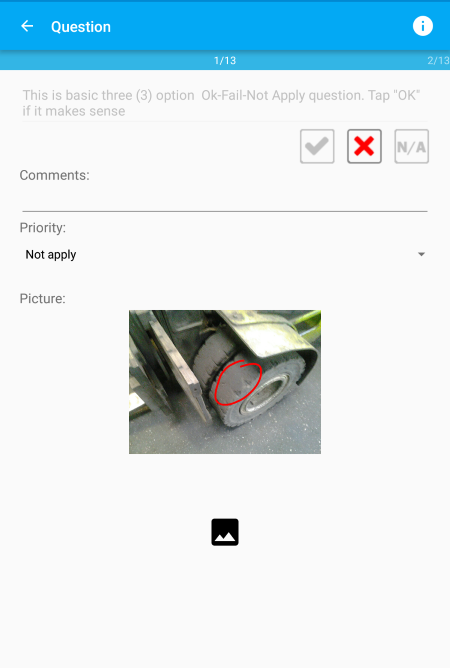
This list shows all the questions contained in a section. You can answer them directly from the list. According to the type you will be prompted to enter the appropriate value
When you need to add comments, priority or support your answer with some photo, you can tap the row to enter into details.
Remenber that you can change this section-by-section question list view to the All questions list view by tapping the button.
You can perform several actions within a question. The following table shows the available actions.
| Action | Description |
|---|---|
| Android iOS | Tap to create a new question. Located in the lower right side for Android devices and in the upper bar for iOS devices. |
| Swipe left the row, the button shows up, then tap to delete. | |
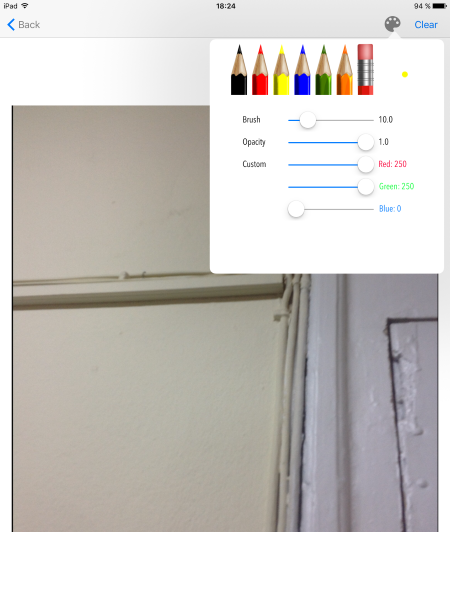
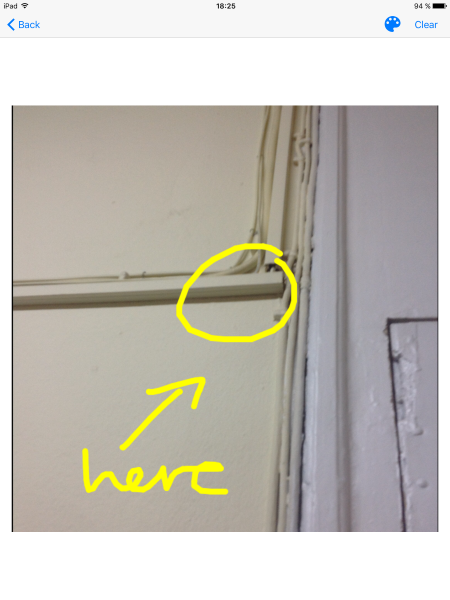
| Take a Photo | When you are in the question details view, you can tap on the photo image to take a photo or select from the camera roll. Once you add a photo, a new photo image appears to add up a new one Power Users Plinius Users up to three (3) photos. You can draw in the photo canvas accessing the edition view. |